因此,在机器翻译等任务中,从训练语料构造词表时,通常会过滤掉出现频率很低的单词,并将这些单词统一标记为UNK(Unknown)。根据Zipf定律,这种做法能筛掉很多不常见词,简化模型结构,而且可以起到部分防止过拟合的作用。此外,模型上线做推断时,也有很大概率会遇到在训练语料里没见过的词,这些词也会被标为UNK。所有不在词表里被标记为UNK的词,通常被称作集外词(Out Of Vocabulary,OOV)或者未登录词。
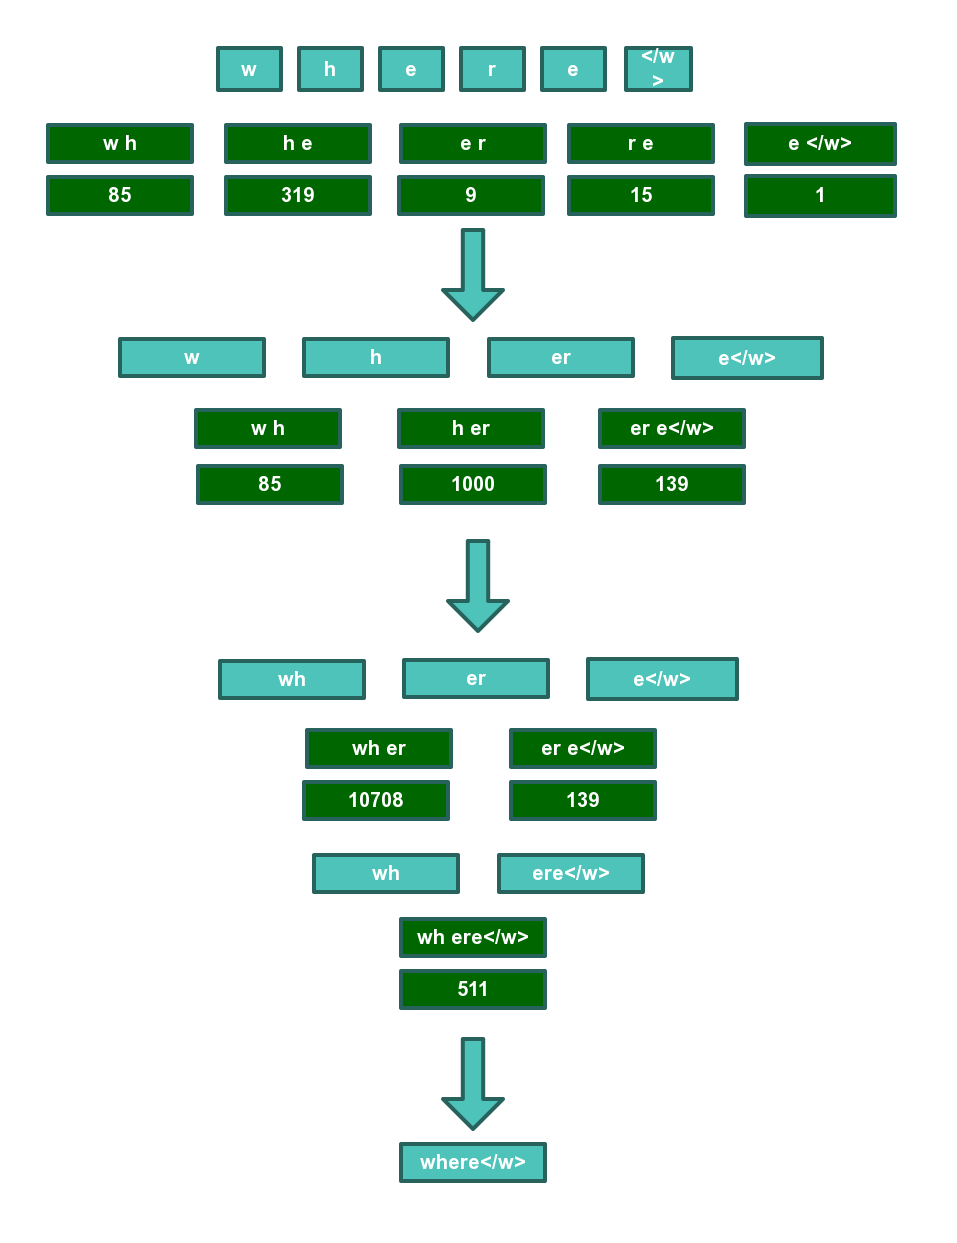
defget_stats(vocab): pairs = collections.defaultdict(int) for word, freq in vocab.items(): symbols = word.split() for i in range(len(symbols)-1): pairs[symbols[i],symbols[i+1]] += freq return pairs
defmerge_vocab(pair, v_in): v_out = {} bigram = re.escape(' '.join(pair)) p = re.compile(r'(?<!\S)' + bigram + r'(?!\S)') for word in v_in: w_out = p.sub(''.join(pair), word) v_out[w_out] = v_in[word] return v_out
vocab = {'l o w </w>': 5, 'l o w e r </w>': 2, 'n e w e s t </w>': 6, 'w i d e s t </w>': 3} num_merges = 1000 for i in range(num_merges): pairs = get_stats(vocab) ifnot pairs: break best = max(pairs, key=pairs.get) vocab = merge_vocab(best, vocab) print(best)
optional arguments: -h, --help show this help message and exit --input PATH [PATH ...], -i PATH [PATH ...] Input texts (multiple allowed). --output PATH, -o PATH Output file for BPE codes. --symbols SYMBOLS, -s SYMBOLS Create this many new symbols (each representing a character n-gram) (default: 10000)) --separator STR Separator between non-final subword units (default: '@@')) --write-vocabulary PATH [PATH ...] Write to these vocabulary files after applying BPE. One per input text. Used for filtering in apply_bpe.py --min-frequency FREQ Stop if no symbol pair has frequency >= FREQ (default: 2)) --total-symbols, -t subtract number of characters from the symbols to be generated (so that '--symbols' becomes an estimate for the total number of symbols needed to encode text). --verbose, -v verbose mode.
我们可以看一下生成的code.file和voc.txt。
code.file:
1 2 3 4 5 6 7 8 9 10 11 12
#version: 0.2 t h i n th e</w> a n r e t i e n o n an d</w> e r ···
beijing , 1 mar ( xinhua ) -- tian feng@@ shan , former heilongjiang governor who is 5@@ 9 years old , was appointed minister of land and resources today . tian feng@@ shan , who was born in zhao@@ yuan county , heilongjiang province , took part in work since july 196@@ 1 and joined the cpc in march 1970 . this should be a natural process set off by economic development ; the " third tier construction " of the 1960s involving fac@@ tory relocation was something entirely different . we must also realize however that from the angle of changing the pattern of resource allocation , we have not yet made the big breakthrough in reform . with regard to joining the world trade organization , one recent reaction has been blind optim@@ ism and the belief that china will profit whatever it does . since these areas where objective conditions are not particularly good can achieve this , other areas where conditions are better can naturally do the same . the objective trend of globalization is calling for international cooperation on a global scale , and a global cooperation has far exceeded the scope of the economy .
解码
那么我们的文件怎么恢复到bpe编码之前的结果呢?
只需要执行下面指令即可。
1 2 3 4
sed -r 's/(@@ )|(@@ ?$)//g' result.txt
# 将解码结果保存到文件中 sed -r 's/(@@ )|(@@ ?$)//g' result.txt > restore.txt
我们恢复之后的结果是:
1 2 3 4 5 6 7
beijing , 1 mar ( xinhua ) -- tian fengshan , former heilongjiang governor who is 59 years old , was appointed minister of land and resources today . tian fengshan , who was born in zhaoyuan county , heilongjiang province , took part in work since july 1961 and joined the cpc in march 1970 . this should be a natural process set off by economic development ; the " third tier construction " of the 1960s involving factory relocation was something entirely different . we must also realize however that from the angle of changing the pattern of resource allocation , we have not yet made the big breakthrough in reform . with regard to joining the world trade organization , one recent reaction has been blind optimism and the belief that china will profit whatever it does . since these areas where objective conditions are not particularly good can achieve this , other areas where conditions are better can naturally do the same . the objective trend of globalization is calling for international cooperation on a global scale , and a global cooperation has far exceeded the scope of the economy .
from subword_nmt import apply_bpe, learn_bpe # 得到分词结果,写到../data/toy_bpe.txt这个文件中 with open('../data/toy_vocab.txt', 'r', encoding='utf-8') as in_file, \ open('../data/toy_bpe.txt', 'w+', encoding='utf-8') as out_file: # 得到分词结果,写到../data/toy_bpe.txt这个文件中 # 1500是最后BPE词表大小,is_dict说明输入文件是个词表文件,格式为"<单词> <次数>" learn_bpe.learn_bpe(in_file, out_file, 1500, verbose=True, is_dict=True)
# 读取../data/toy_bpe.txt分词结果,并作用于../data/bpe_test_raw.txt中的文本,最后写到../data/bpe_test_processed.txt文件中 with open('../data/bpe_test_raw.txt', 'r', encoding='utf-8') as in_file, \ open('../data/bpe_test_processed.txt', 'w+', encoding='utf-8') as out_file, \ open('../data/toy_bpe.txt', 'r', encoding='utf-8') as code_file: # 构造BPE词表 bpe = apply_bpe.BPE(code_file) for line in in_file: # 使用BPE分词 out_file.write(bpe.process_line(line))
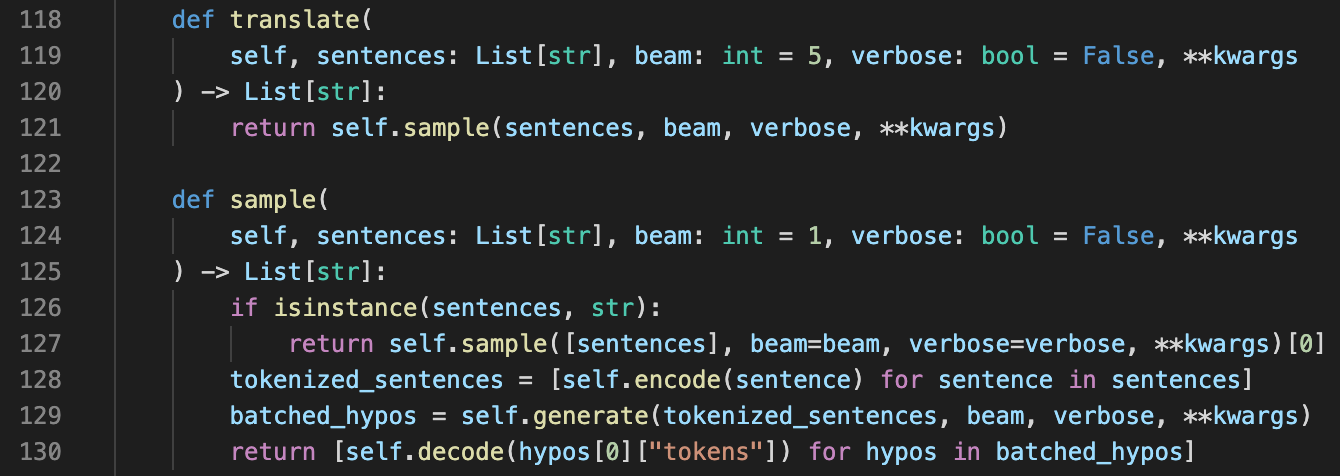
该函数首先会调用FairseqTask.build_generator of <fairseq.tasks.translation.TranslationTask>函数,并传入gen_args参数(该参数中包含了beam)。在该函数会执行search_strategy = search.BeamSearch(self.target_dictionary)函数实例化BeamSearch(使用到了model/wmt16.en-de.joined-dict.transformer/dict.de.txt),并与模型一块放到SequenceGenerator中进行实例化,而实际进行推理时也是调用的SequenceGenerator.generate of SequenceGenerator,同时进行模型推理+BeamSearch过程。
具体细节我们先不关注,先说下输入输出。其输入为
经过推理之后,输出结果为(下面5个结果的tokens是不一样的,这里显示不出来):
后处理
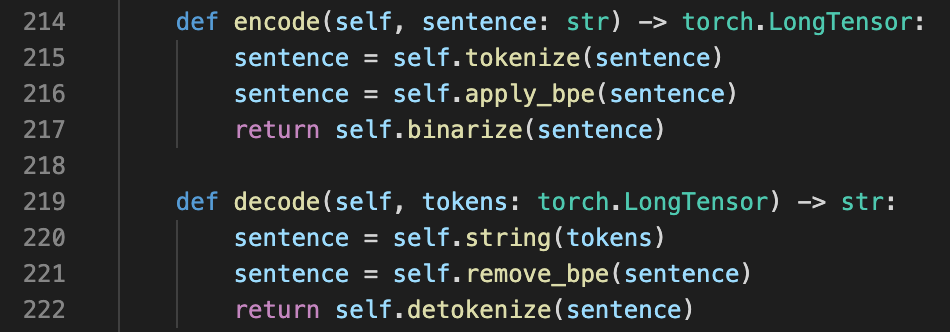
最后,我们来看下后处理流程。后处理的对应的代码是[self.decode(hypos[0]["tokens"]) for hypos in batched_hypos]。也就是将tensor([12006, 165, 488, 88, 2], device='cuda:0')输入到self.decode函数中。该函数的主要流程是string->去除bpe->去分词。
我们先来看self.string函数,该函数与self.binarize函数相反,它会调用Dictionary.string of <fairseq.data.dictionary.Dictionary>,查询前面的tgt_dict,将ID映射回字符串(ID简单理解为model/wmt16.en-de.joined-dict.transformer/dict.de.txt中的行数+4)。它的输入为tensor([12006, 165, 488, 88, 2], device='cuda:0'),输出为'Hall@@ o Welt !'。
接着来看self.remove_bpe函数,它与self.apply_bpe函数作用相反,该函数会调用SubwordNMTBPE.decode of <fairseq.data.encoders.subword_nmt_bpe.SubwordNMTBPE>,我们这里先不管这个函数干了啥,先介绍它的输入输出。其输入为:'Hall@@ o Welt !',输出为'Hallo Welt !'。
# This will make the dataset compatible to the one used in "Convolutional Sequence to Sequence Learning" # https://arxiv.org/abs/1705.03122 # 如果指定参数--icml17,就将语料2替换成wmt14的语料,而不是使用wmt17的语料,这是为了和ConvS2S论文保持一致 if [ "$1" == "--icml17" ]; then URLS[2]="http://statmt.org/wmt14/training-parallel-nc-v9.tgz" FILES[2]="training-parallel-nc-v9.tgz" CORPORA[2]="training/news-commentary-v9.de-en" OUTDIR=wmt14_en_de # 指定输出文件夹名 else OUTDIR=wmt17_en_de fi
echo"pre-processing train data..."# 预处理训练语料 for l in$src$tgt; do rm $tmp/train.tags.$lang.tok.$l# 如果存在,先移除 for f in"${CORPORA[@]}"; do cat $orig/$f.$l | \ perl $NORM_PUNC$l | \ # 先标准化符号 perl $REM_NON_PRINT_CHAR | \ # 移除非打印字符 perl $TOKENIZER -threads 8 -a -l $l >> $tmp/train.tags.$lang.tok.$l# 分词 done done
echo"pre-processing test data..."# 预处理测试语料 for l in$src$tgt; do if [ "$l" == "$src" ]; then t="src" else t="ref" fi grep '<seg id'$orig/test-full/newstest2014-deen-$t.$l.sgm | \ #这一块操作没看懂 sed -e 's/<seg id="[0-9]*">\s*//g' | \ sed -e 's/\s*<\/seg>\s*//g' | \ sed -e "s/\’/\'/g" | \ perl $TOKENIZER -threads 8 -a -l $l > $tmp/test.$l# 分词 echo"" done
预处理完毕之后,test.en的其中一条语句为They are not even 100 metres apart : On Tuesday , the new B 33 pedestrian lights in Dorfparkplatz in Gutach became operational - within view of the existing Town Hall traffic lights .。可以看出来,标点符号已经和字母分开了。
9、
1
2
3
4
5
echo"splitting train and valid..."# 划分训练集和验证集 for l in$src$tgt; do awk '{if (NR%100 == 0) print $0; }'$tmp/train.tags.$lang.tok.$l > $tmp/valid.$l# 从训练集中,每100个句子抽1个句子作为验证集 awk '{if (NR%100 != 0) print $0; }'$tmp/train.tags.$lang.tok.$l > $tmp/train.$l done
for L in$src$tgt; do for f in train.$L valid.$Ltest.$L; do# 用学到的bpecode应用到三份语料中(训练语料,验证语料,测试语料) echo"apply_bpe.py to ${f}..." python $BPEROOT/apply_bpe.py -c $BPE_CODE < $tmp/$f > $tmp/bpe.$f# 输出到tmp中对应的文件,以bpe.作为前缀 done done
可以看这里: when you specify —share-all-embeddings then the embedding matrices for encoder input, decoder input and decoder output are all shared. when you specify —share-decoder-input-output-embed, then the matrices for decoder input and output are shared, but encoder has its own embeddings.